You want your space to look amazing, right? With 100% Waterproof Hardwood VSPC Flooring, you can get that professional finish you see in magazines. This flooring is simple to install, strong, and perfect for busy homes. If you follow each step, your floors will last and look beautiful.
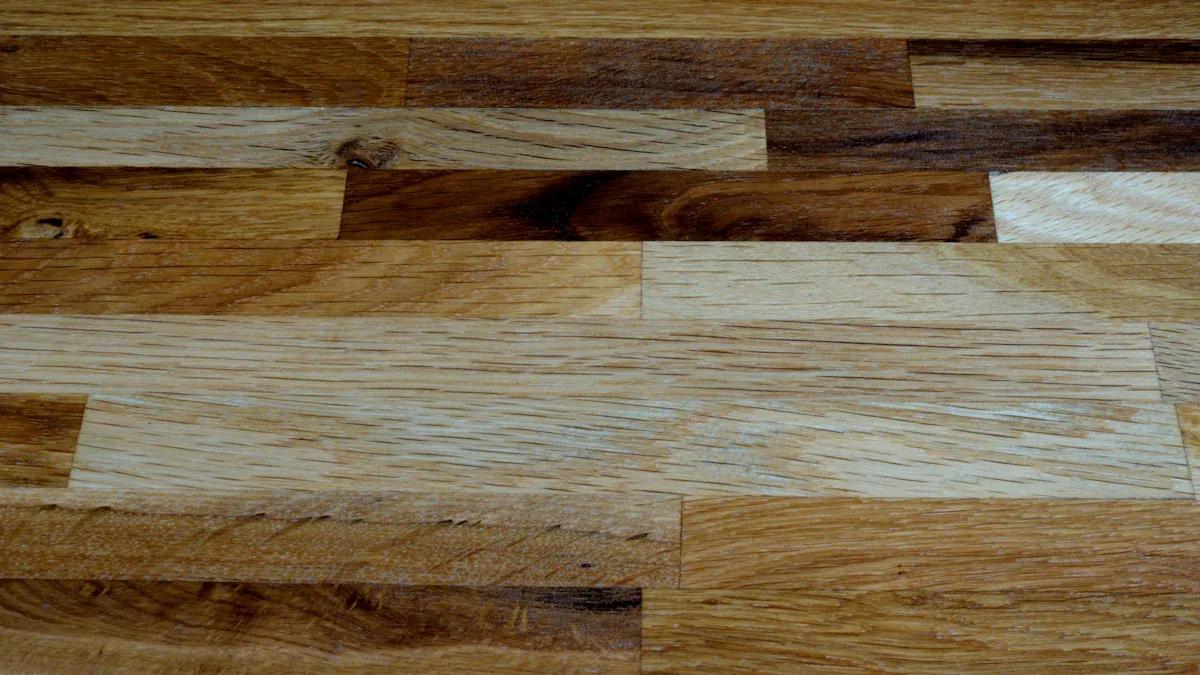
Engineered hardwood flooring looks nice and lasts long. It does not let water in, so you can use it in kitchens and bathrooms.
Getting the subfloor ready is very important. It stops problems like bumpy floors and spaces between boards. This makes the floor last longer.
Use a clear plan before you start putting in the floor. This helps you not make mistakes and makes the floor look good.

You want a floor that looks nice and lasts long. Engineered wood flooring gives you both style and strength. It has real wood on top and a waterproof core inside. There is a special coating with nine layers to protect it. You also get a Cork/IXPE layer for comfort and less noise. The Unilin Click System helps you put the floor together easily.
Here’s why engineered wood flooring is a good choice:
It keeps water out better than regular hardwood.
You can use it in kitchens, bathrooms, or basements.
The real wood top makes it look and feel real.
It works well for homes with pets and handles spills.
The layers stop the floor from bending or shrinking.
Feature | Engineered Hardwood | Traditional Hardwood | Laminate Flooring |
|---|---|---|---|
Authentic Look | Yes | Yes | No |
Moisture Resistance | High | Low | Moderate |
Installation Areas | Many | Limited | Limited |
Durability | High | Moderate | High |
You need to get the subfloor ready before you start. This helps your engineered hardwood floor last longer and look good. If you skip this, your floor might bend, have gaps, or look uneven.
Common subfloor problems and what they do:
Issue | Impact on Installation |
|---|---|
Improper subfloor preparation | Uneven flooring, buckling, or gaps |
Failing to level the surface | Instability and possible damage |
Inadequate debris removal | Affects locking mechanisms |
Incorrect plank alignment | Damages locking system, causes instability |
Insufficient acclimation time | Warping or gaps after installation |
Letting the flooring get used to your room is important. Even though engineered hardwood waterproof floors handle water, you should let the planks sit for three days. This stops warping or gaps from happening later. Always check the manufacturer’s rules so your warranty stays safe.
Tip: If you skip letting the flooring settle, you might pay for repairs. Take your time and let the planks adjust in your room.
You need some tools to put in engineered wood flooring:
Hygrometer (checks humidity)
Chalk line
Vacuum and broom
Tape measure
Carpenter’s square
Pencil or marker
Wooden spacers
Utility knife
Safety glasses and work gloves
Knee pads
Engineered hardwood flooring planks
Underlayment and moisture barrier (if needed)
Floor transitions and molding
If you prepare well, your engineered hardwood floors will look great and last a long time.
Before you start to install floating engineered hardwood flooring, you need a good plan. Planning helps you avoid mistakes and makes your floors look amazing. Here’s a step-by-step guide to layout planning:
Measure your room. Write down the length and width.
Decide which way you want the planks to run. Most people run them parallel to the longest wall.
Stagger the joints. Make sure the end joints of each row do not line up with the next row. Stagger them by at least 6 inches. This gives your floors strength and a professional look.
Avoid H-seams. Stagger the joints by at least two rows to keep your floating engineered hardwood flooring stable.
Plan for obstacles. Measure around things like vents or columns. Use a jigsaw for precise cuts.
Undercut door jambs. This lets you slide the flooring under the door for a smooth finish.
Leave space for expansion. Use spacers along the walls. This helps with high moisture resistance and stops buckling.
Lay out transition pieces. Plan where you will use T-molding or reducers to connect to other floors.
Finish with baseboards. These cover the expansion gap and make your floating engineered hardwood flooring look neat.
Tip: Always measure twice before you cut. This saves time and materials during your diy project.
Now you’re ready for the installation process. The best method to install floating engineered hardwood flooring is the floating method. You don’t need glue or nails. The Unilin Click System makes it easy for anyone to install floating engineered hardwood flooring, even if you’re new to diy.
Here’s a step-by-step guide for how to install 100% waterproof hardwood vspc flooring:
Start with installation preparation. Make sure your subfloor is clean, dry, and level. This helps with high moisture resistance and stops problems later.
Lay down underlayment if needed. Some floors have a built-in layer, but check the instructions.
Begin in a corner. Place spacers between the wall and the first plank.
Install the first row. Click the planks together end-to-end. Keep the groove side facing the wall.
For the second row, angle the plank and click it into the first row. Stagger the joints by at least 6 inches.
Continue to install floating engineered hardwood flooring row by row. Use the Unilin Click System to lock each plank in place.
Cut the last plank in each row to fit. Use a utility knife or saw.
Keep checking that the rows stay straight. Use a chalk line if needed.
Follow the instructions for expansion gaps. This helps with resistance to buckling.
When you reach the last row, cut the planks to fit the space. Use spacers along the wall.
Note: Don’t skip the instructions from the manufacturer. They help you avoid common mistakes and protect your warranty.
You may need to install floating engineered hardwood flooring around doors, corners, or other obstacles. Here are some tips to help you:
Use a jigsaw for tricky cuts around vents or pipes. Measure twice before cutting.
For doorways, undercut the door jambs. Slide the plank underneath for a seamless look.
When you reach another type of flooring, use transition pieces. These help connect your floating engineered hardwood flooring to tile, carpet, or vinyl.
Here’s a table to help you choose the right transition:
Transition Type | Description |
|---|---|
T-Molding | Connects two floors of equal height, like hardwood to laminate. |
Reducer Molding | Bridges height differences, making a gentle slope to prevent tripping. |
Quarter-Round Molding | Covers gaps between the floor and baseboard for a clean finish. |
Always finish with baseboards. Nail them to the wall, not the floor, so your floating engineered hardwood flooring can move as needed.
Tip: If you’re not sure how to install floating engineered hardwood flooring around a tricky spot, check the instructions or ask for help.
You want your floors to look like a pro did the job. Here’s how to install floating engineered hardwood flooring with a flawless finish:
Sand the floor lightly after installation. This makes the surface smooth and even.
Apply a finish if needed. Some floors come pre-finished, but on-site finishing lets you control the sheen and texture.
Seal the edges. This helps with resistance to water and keeps your 100% waterproof hardwood vspc flooring looking great.
Check for gaps between planks. If you see any, tap the planks together gently.
Watch for cupping or buckling. Keep the room’s humidity stable for the best resistance to warping.
Clean up dust and debris right away. This keeps your floating engineered hardwood flooring looking fresh.
Note: Most visual flaws happen when you skip steps or rush. Take your time and follow the instructions for each part of the installation method.
Trioflor’s 100% waterproof hardwood vspc flooring makes it easy to install floating engineered hardwood flooring. The Unilin Click System and customizable options help you get the look you want. With the right installation methods and a careful approach, you can install floating engineered hardwood flooring that lasts for years.
Keeping your Trioflor floors clean is simple. You want your floors to shine and last, so use the right products and tools. Try these tips:
Pick a microfiber mop to trap dust and dirt. It uses less water, so your floor stays safe.
Spray mops work well for quick cleaning. They control how much cleaner you use.
Stay away from harsh chemicals. They can hurt the finish.
Clean up spills right away with a soft cloth.
You should sweep or vacuum every week. Deep clean your floors every month or two, depending on how many people walk on them.
Sometimes, you might see gaps, squeaks, or lifting. Don’t worry—most problems have easy fixes.
Sweep or vacuum often to stop dirt from scratching the surface.
Wipe up spills fast to keep water from getting into the seams.
If you hear squeaks, try using a little powdered graphite between the boards.
For small gaps, use a humidifier to add moisture to the air.
Replace any damaged planks if needed.
Tip: Place rugs near doors and sinks to catch water and dirt before it reaches your floor.
You want your floors to look great for years. Here’s how you can help them last:
Put felt pads under furniture legs to stop scratches.
Use area rugs in busy spots.
Keep blinds or curtains closed during the sunniest part of the day.
Keep your home’s humidity between 35% and 55%.
Think about professional refinishing if your floor starts to look dull.
With these steps, your Trioflor flooring will stay beautiful and strong.
You can get a pro finish with Trioflor’s waterproof hardwood flooring by following these steps:
Clean your subfloor.
Use the right adhesive and moisture barrier.
Work in small sections.
Let the floor cure.
Feature | Benefit |
|---|---|
Click System | Easy DIY install |
Waterproof | Lasts for years |
Keep up with simple care for lasting beauty. If you need help, guides and experts are always available.
Yes, you can! The waterproof core lets you use it in bathrooms, kitchens, or basements without worry.
Tip: Always clean up spills quickly for best results.
No, you don’t. Basic tools like a tape measure, utility knife, and spacers work well. The Unilin Click System makes installation easy.
You can replace the damaged plank. Just unlock the affected piece and click in a new one. Your floor will look fresh again!